Documentation
Custom templates
Template language
When writing your own custom templates you can place user data into your HTML via Template Variables using the following {{variable}} notation.
If a Template Variable is not specified in your template, the associated input field will not appear to your users when they're editing the email signature.
Currently custom templates supports the following variables:
| Full Name User's full name |
{{name}} |
| Job User's job tile or role |
{{job}} |
| Department User's department |
{{department}} |
| Email User's email address |
{{email}} |
| Phone Number User's phone number |
{{phone}} |
| _Phone Number User's phone number without spaces |
{{_phone}} |
| Mobile Number User's mobile phone number |
{{mobile}} |
| _Mobile Number User's mobile phone number without spaces |
{{_mobile}} |
| Avatar User's uploaded profile image URL |
{{avatar}} |
| Scheduling User's scheduling link |
{{schedulingLink}} |
| Scheduling Title (Request Type) Label or title displayed for the user's scheduling link |
{{schedulingTitle}} |
Variables without spaces
You may have noticed that versions of the phone numbers are available without spaces via Template Variables with an underscore prefix eg. {{_mobile}}
These are intended to be used in association with links to ensure that a phone call to the correct number is triggered when a user clicks on it.
<a href="tel:{{_phone}}">{{phone}}</a>Embed a profile image
Paid FeatureTo embed the user's uploaded profile image into your email signature you'll need to use a snippet of code similar to this:
<img src="{{avatar}}" class="avatar" alt="" width="100" height="100" style="display: block; border: 0; max-width: 100px;">
Important Please ensure your img element has a class of avatar. This will ensure that the preview profile image renders correctly for users that select to crop the upload into a circle.
Note If the user does not decide to upload an image, the {{avatar}} tag will default to rendering the URL of a transparent 1x1 gif.
To utilize profile images in your custom templates you will need to be on a Basic plan or higher. More information on our plans can be found on the pricing page.
Conditional Logic
NewYou can now show specific HTML in your custom templates based on whether or not a Template Variable value exists. This is achieved by adding a sh:if="variable" attribute to a HTML element:
<tr sh:if="avatar">
  <td>
    <img src="{{avatar}}" class="avatar" alt="" width="100" height="100" style="display: block; border: 0; max-width: 100px;">
  </td>
</tr>
You may also use a negation operator (sh:if="!variable") to specify any HTML elements that should be rendered if the associated Template Variable value is empty.
<tr sh:if="!avatar">
  <td style="padding: 40px 0px 0px;"></td>
</tr>
Testing custom templates
It is imperative that you test your custom templates thoroughly. Coding for email is notoriously tedious with its HTML tables and inline CSS. Rendering issues are also common so we suggest using a tool such as Litmus to ensure your signature renders as desired across all the major email clients.
Seasonal Calls to Action
Updating your Call to Action Image
We offer the ability to dynamically update your signature's call to action image without the need for your users to re-install their signature.
Take the following signature for example and say you wanted to update the "Doggy Food Sale" call to action banner:
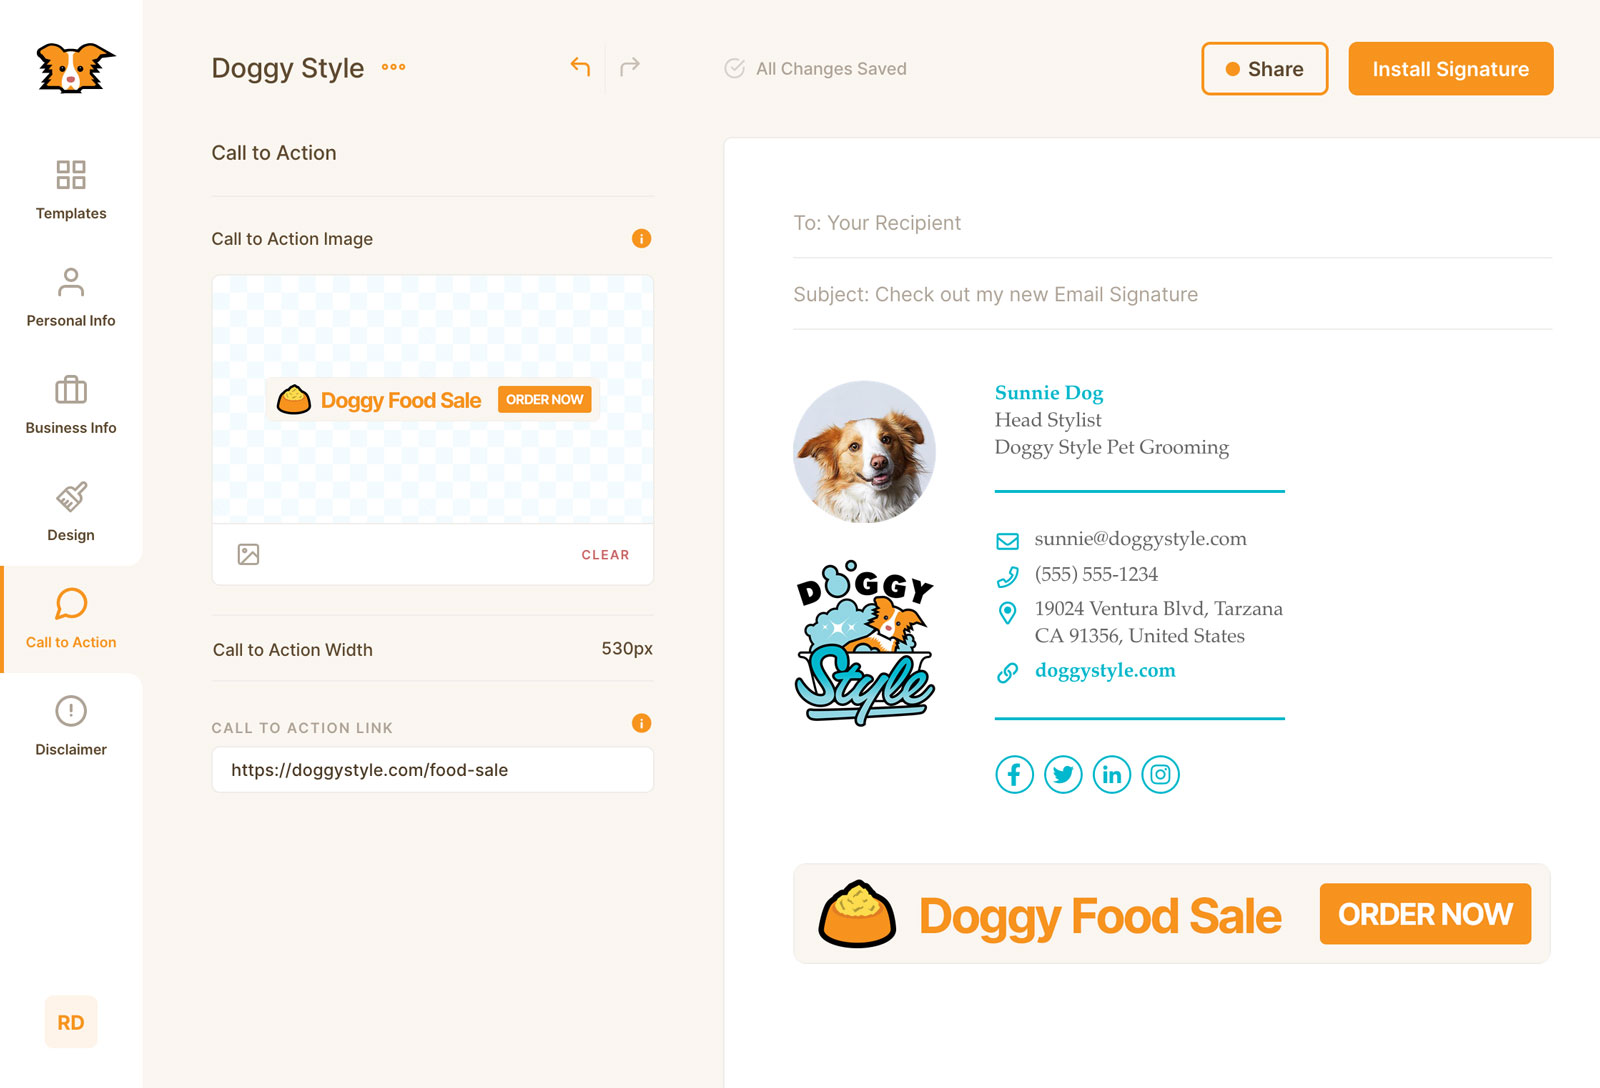
- Open your signature in the Signature Editor and locate the Call to Action image block.
- Click the Update button next to the existing Call to Action image.
-
Upload your replacement Call to Action image and confirm the update.
Important Your replacement image should be the same dimensions as your existing image. Replacing the image with one of different dimensions will cause it to stretch to fit the original image's size.
Do not delete the existing Call to Action image and upload a new one. Deleting and re-adding the image creates a new asset, which will not update already installed signatures. Always use the Update button to replace the image.
-
When your users send their next email, they should see the replacement image in their signature.
Important Email clients and browsers implement asset caching. Please allow up to 24 hours for your image to update across all installed signatures.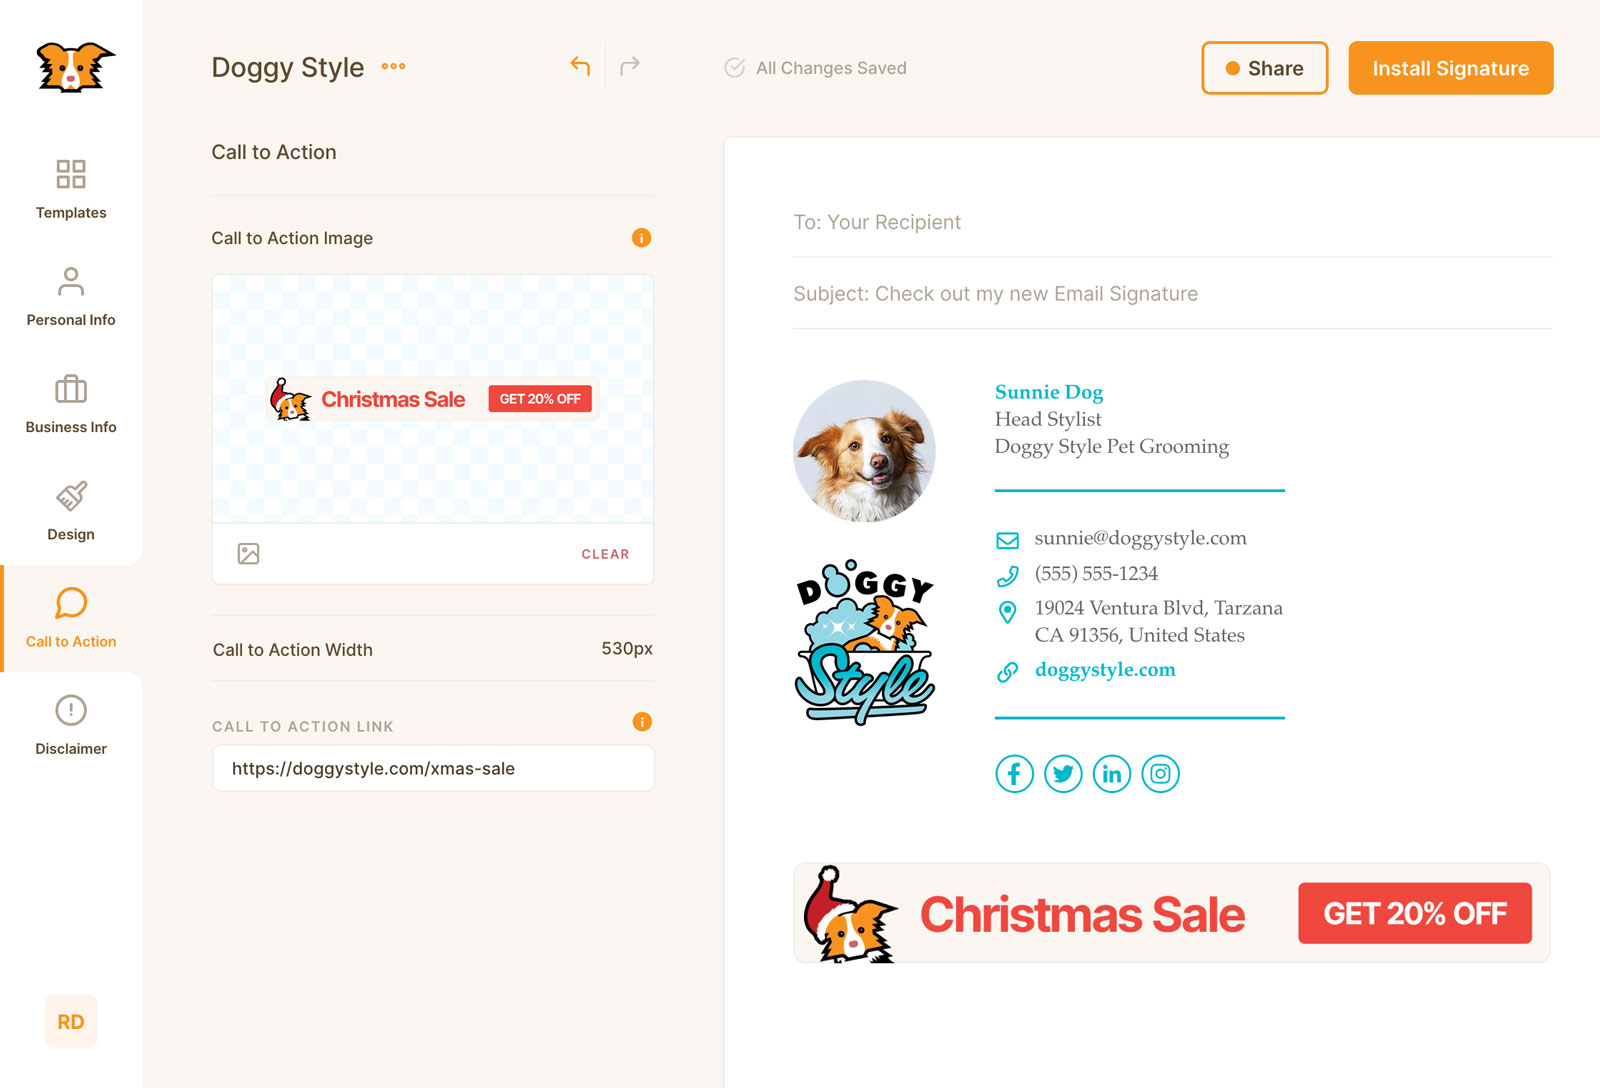
Updating your Call to Action Link
You can also dynamically update where users are directed when they click on a Call to Action banner without requiring users to re-install their signature.
Simply update the existing Call to Action Link in your Signature Editor and click Share → Update Share Link to publish the change.
Troubleshooting
I've updated my Call to Action Link but when I click my user's call to action image nothing happens.
If your Call to Action Link was empty when the signature was first installed, then no link was attached to the image.
Your users will need to re-install their signature to attach the link.
I've updated my Call to Action Link but when I click my user's call to action image it redirects to the old link.
You must publish your new Call to Action Link by clicking Share and then Update Share Link for the change to take effect.
Installing Your Signature
Choose your email client
It's important that when you are installing your signature you select your email client. Selecting your desired client allows us to perform some behind the scenes alterations to your signature's code that are specific to that email client. This will help guarantee your signature renders without any issues.
For example Spark (MacOS) will introduce extended margins if you were to copy and paste the signature as it is.
What if my email client isn't listed?
Let us know if your email client is missing from our database and we'll test it's compatibility with Signature Hound and add instructions as soon as we can.
In the meantime we provide the ability for you to copy your signature to your clipboard (as well as copy the HTML and download the HTML file). With these tools you should be able to install your signature to any email client that supports HTML email signatures.
White Label Branding
Uploading your logo
Paid FeatureUsers on the Pro plan have the ability to replace the Signature Hound logo with their own when sharing signature ie. the top left corner of the edit signature screen and in any emails sent via the platform when sharing via email or CSV.

To setup White Label Branding upgrade to the Pro plan. Once you've done this a placeholder logo will appear in the bottom of the edit signature sidebar. Clicking this will open a popup that allows you to upload your logo.
Note Your logo will be cropped into a small circle so use an image that works best in this scenario eg. your Instagram or Facebook profile picture.